Tag: Halloween

Welcome October!

Welcome October!

Happy First Day of October!! I have so many new things to share with you guys! For today, I am just going to say that I am so excited it is finally October!

Salt River Fields Halloween Spooktacular

Salt River Fields Halloween Spooktacular

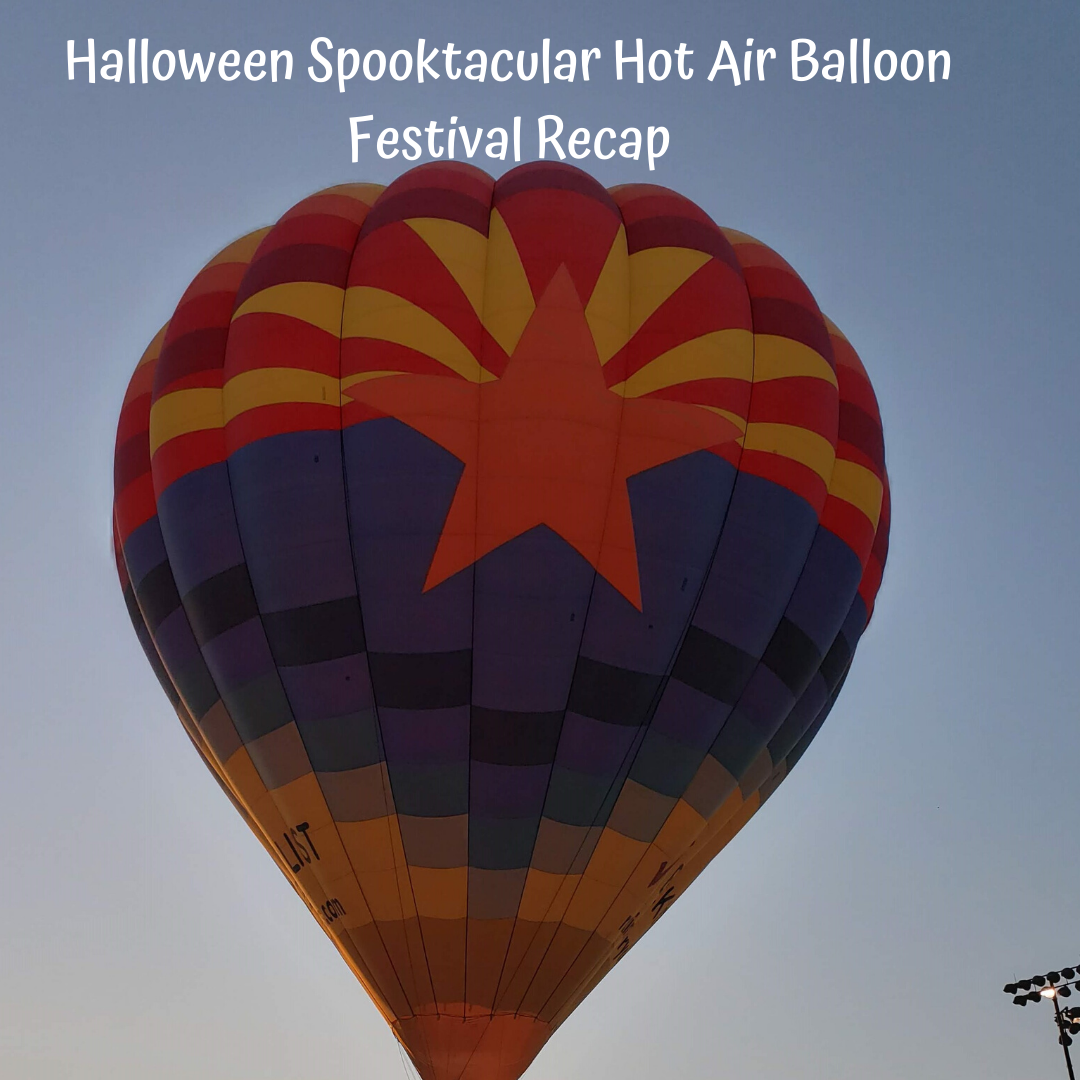
Happy Halloween Everyone!! I hope you all had a happy and safe time trick-or-treating or passing out candy. **Sponsored Post**Today, I wanted to share with you my recap of the Halloween Spooktacular Hot Air Balloon Festival I attended on Saturday. If you are local to 

Mickey Shaped Pumpkin Sugar Cookies

Mickey Shaped Pumpkin Sugar Cookies

Mickey Shaped Pumpkin Sugar Cookies

Total Time 20 minutes
Servings: 3 Dozen

Ingredients
  

Sugar Cookie Dough
  • 3 Tbsp All Purpose Flour
  • 1/2 Cup Butter Melted
Royal Icing
  • 4 Cups Powdered Sugar
  • 3 Tbsp Meringue Powder
  • 9 Tbsp Room Temperature Water
  • Gel Food Coloring Optional

Method
 

Sugar Cookie Dough
  1. Heat oven to 375*F.
  2. Stir flour into dry cookie mix in a medium bowl. Add melted butter and egg.
  3. Mix until a soft dough ball forms.
  4. Mix in food coloring until the orange is the desired color.
  5. Roll dough on floured surface until 1/4 inch thick.
  6. Cut with cookie cutter, place one inch apart on an ungreased cookie sheet.
  7. To make the stem, be sure to cut a small piece of spare dough and place gently in between the ears.
  8. Using a toothpick or other pointed object, draw lines gently on the cookie to resemble a pumpkin.
  9. Bake for 5-8 minutes until the edges are light golden brown.
  10. Cool for 2 minutes before removing from pan. Place on cooling rack once removed.
  11. In the mean time, put together the icing.
  12. Once cookies are cool, commence with icing the Mickey heads however you desire.
  13. The first step is to outline and fill in the stem and add the vines.
  14. Next, it's time to put on the face.
  15. I found that putting the nose on first, a horizontal oval worked best for me.
  16. Next, I would draw the eyes, whatever shape you want to make them is great. I found comma's frontward and backward worked best.
  17. Finally, I found a simple smile worked best.
  18. Enjoy!
Icing
  1. Using either a spoon or hand mixer, beat all of the icing ingredients together until smooth. The icing should be drizzle down smoothly but not be too runny.
  2. Separate into bowls and add food coloring. Mix until it reaches the desired color.
  3. Place in a piping bag or Ziploc bag. I found using a Ziploc and frosting tip worked perfectly fine.
Super Simple Crescent Roll Mummy Hot Dogs

Super Simple Crescent Roll Mummy Hot Dogs

Happy Tuesday!! I hope you all had a fantastic day! It was so chilly this morning and finally feels like Fall. I was born and raised right here in AZ so having it be 44 degrees this morning had me ready to run back inside